http://www.sarthak.net/blogz/
Search engine- search interesting, lizard, lizarus, anything!

Wednesday, August 29, 2012
World's youngest Grandma!

How old is YOUR grandma/mimi/nonny? 50ish? 60ish? WELL, a Romanian woman is said to be…
23…yes, as in TWENTY THREE YEARS OLD…born in 1988! According to numerous online reports, Rifca Stanescu ran away from home when she was 11 and eloped with her 13 year old boyfriend. They had their first child a year later.
23…yes, as in TWENTY THREE YEARS OLD…born in 1988! According to numerous online reports, Rifca Stanescu ran away from home when she was 11 and eloped with her 13 year old boyfriend. They had their first child a year later.
Well, now Rifca’s 11 year old daughter went and got hitched at the age of 10 and now has a child of her own, making Rifca arguably the world’s YOUNGEST Grandma!
According to what I’ve read, Rifca’s family forgave her for running away after the birth of her first child and wanted MORE for her daughter…but that obviously hasn’t worked out quite like she had planned.
Oh and one more little side note…Rifca’s mother is 40, which may make her the world’s YOUNGEST GREAT-GRANDMA.
NOT WINNING!
Tuesday, August 28, 2012

French Braiding, Fishtail, Waterfall Braids
French Braid 
From:http://www.realsimple.com/beauty-fashion/hair/tools-techniques/french-braid-hair-00000000002190/index.html
Follow These Seven Easy Steps

Time Inc. Studios
1Brush hair
Before braiding, brush hair to smooth out any knots or tangles.

Time Inc. Studios
2Gather hair at top of head; divide into three sections
Starting at the hairline, gather enough hair from top of head to start a regular braid. Divide hair into three equal sections. Hold right section in right hand, left section in left hand, and middle section between thumb and another finger of either hand.

Time Inc. Studios
3Cross the sections
To begin braid, cross right section over middle section, then repeat this move with left section, smoothing hair down as you go. Pull sections fairly tight; you don’t want the braid to be loose and come undone.

Time Inc. Studios
4Add hair to the section
Before repeating your cross-over motion with the right section, gather a little bit of additional hair from the head’s right side, and add it to this section; now cross this larger portion of hair over the middle section of the braid.
Tip: Make sure that the sections of hair you’re adding are roughly equal or the braid will look lopsided.
Tip: Make sure that the sections of hair you’re adding are roughly equal or the braid will look lopsided.

Time Inc. Studios
5Add hair to the section on the other side
Gather a small section (of equal size to the one you just gathered) of the remaining hair on the left side of your head up and into the left section and cross that over the middle section.
Tip: Slightly dirty hair has less “slip,” making it easier to braid.
Tip: Slightly dirty hair has less “slip,” making it easier to braid.

Time Inc. Studios
6Repeat adding hair and crossing sections
Repeat steps 4 and 5, adding hair until you’ve gathered in all additional hair strands. Finish at the bottom with a regular braid.

Time Inc. Studios
7Secure the braid at the end with a band
Fishtail
Once you reach the bottom of the braid, secure the end with a hair band, wrapping it tightly around the hair.
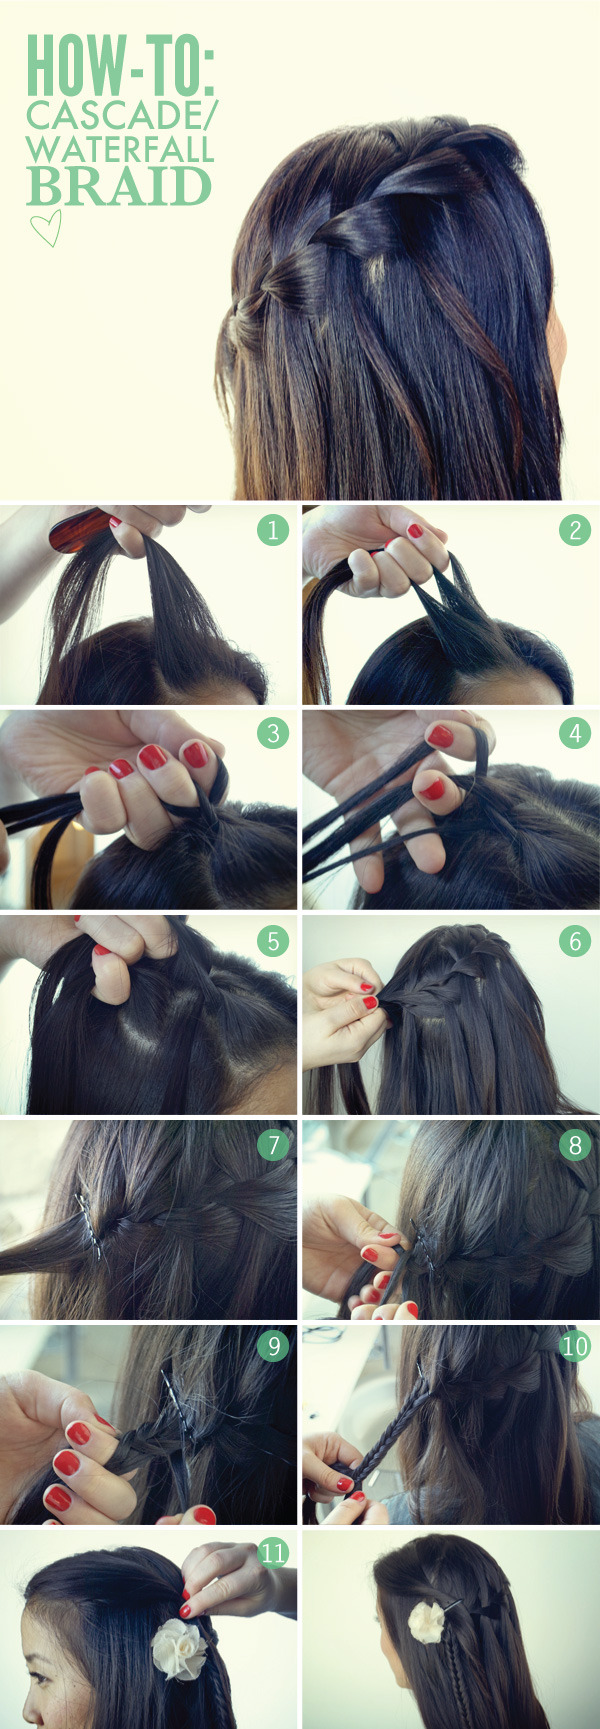
The cascade braid recently exploded as the new "trend braid" of the season. The waterfall effect looks cool and complex, but it's easier to style than you think. Give this beautiful braid a try when Beautylish takes you through the how-to!
STEPS 1 + 2
Section Off
This style works best on straight or loose waves. Brush out all the knots with a wide tooth comb. Part your hair how you normally would, and begin your braid on the right side of your part. Grab the top section and divide into three strands.
STEPS 3 + 4
Braid As Usual
Braid your strands regularly three times, beginning from the right strand. When you get to the left strand (the part closest to the middle of the scalp), add more hair to it like a French braid and fold that strand to the center.
STEP 5
Drop the Strand
This is where it gets tricky. After you've French braided your left strand (now center), drop the right strand and let it fall down. Pick up another small section of hair next to where your original strand fell—that's your new right strand.
STEP 6
Step and Repeat
Repeat this process—French braid the left strand, drop the right strand, and pick up an adjacent new piece. Gradually cascade the style towards the middle of your head.
STEP 7
Pin and Secure
Once you've reached a comfortable point to stop your braid, secure it to your scalp with bobby pins. You don't have to pin up your hair perfectly in this section since you'll cover up the pins with a hair accessory later.
STEPS 8 + 9 + 10
Fishtail It!
Braid the remaining piece of hair left from your cascade into a fishtail braid. Not sure how to create this mermaid-inspired style? It's easy with this helpful fishtail braid tutorial. Secure the braid with a thin hair tie.
STEP 11
Accessorize
Add a cute bow or flower to hide your bobby pins and give this look some extra hair flair. Secure your barrette tightly to your scalp and braid for a firm hold.
Take the extra strand of hair on the opposite side of your face and pin it back into the flower barrette so it blends in with your cascade. Spritz with a light-hold hairspray, and you've got yourself a beautiful and romantic summer hair style!
Fishtail 
1. Part your hair down the center. Beginning on the right side of your part at your forehead, twist a one-inch section of hair away from your face.
2. Use a comb to separate a 1/2-inch section right below the first section along your face and twist that piece away from your face, combining it with the first piece.
3. Continue adding 1/2-inch pieces along your hairline down to your neck. Use a clip or a bobby pin to hold the hair in place at the nape of your neck.
4. Repeat the twisting on the left side, starting at your forehead.
5. When you reach the nape of your neck, unclip the right side and hold both the left and right sides in two separate sections.
6. Pull a 1/2-inch section of hair from the right section and add it to the left section. Repeat with a piece from the left section, adding it to the right section.
7. Continue adding 1/2-inch pieces down to the ends and secure with an elastic.
Have fun girls!!! :D
cRAFT: mAKE yOUR oWN hOODIE
From:
http://making-your-own-style.fabsugar.com/How-make-your-own-Hoodie-tutorial-603430

4. Now you should have 5 pieces. 1 back. 2 front. 2 sleeves. If you don't have this reread steps 1-3.
http://making-your-own-style.fabsugar.com/How-make-your-own-Hoodie-tutorial-603430
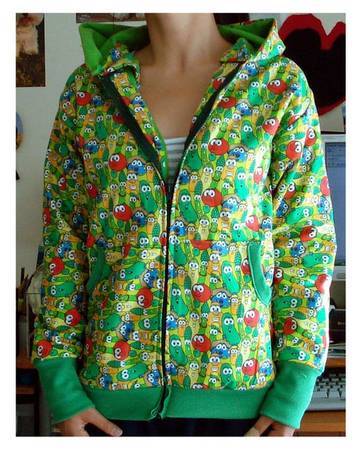
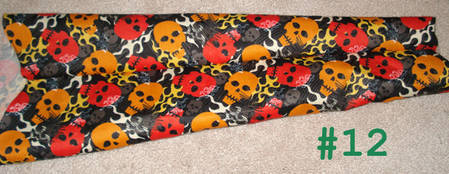
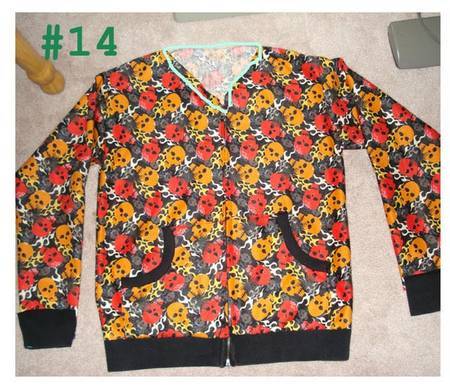
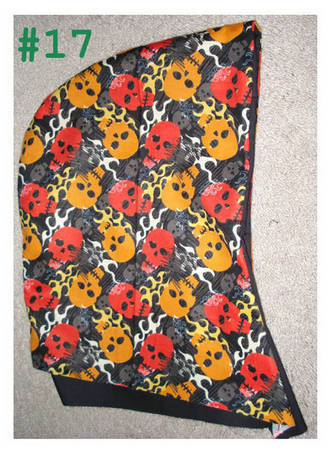
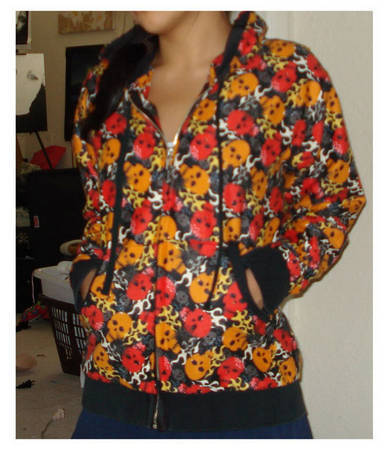
Ok i came across this tutorial i thought i'd share with u guys from www.craftster.org and thought its damn cool..even though i haven't ever tried sewing an item of clothing before i may give it a try!!!
So the site says-
so to start things off. my veggietales hoodie. not really a flattering color or print but it's super warm because i lined the entire hoodie, sleeves and all, with flannel.
so to start things off. my veggietales hoodie. not really a flattering color or print but it's super warm because i lined the entire hoodie, sleeves and all, with flannel.
now onto the tutorial. please read this carefully before asking too many questions. I'll try to be as clear as possible. I directed this tutorial towards someone who has sewn a piece of clothing before. Not going into detail about how to attach sleeves and such but it should be quite simple to figure out.
Materials: 2+ yards of main fabric, .5 yard lining (for hood), 20" or longer separating zipper, .5 yard rib knit fabric, 1 tshirt, it would also be useful to have a hoodie next to you while you're doing this just to make sure things look right.
Instructions:
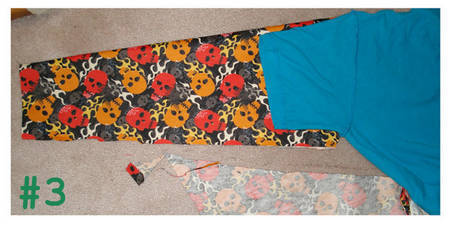
1. Place the tshirt on top of the fabric. fold the sleeves in and cut out the shape adding about .75" on both sides.
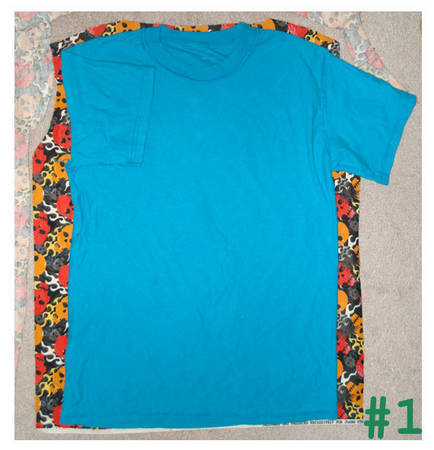
2. Take the piece you just cut out and fold it in half. Lay it over the fabric and cut it out adding 1" - 1.5" to the straight edge. Repeat.
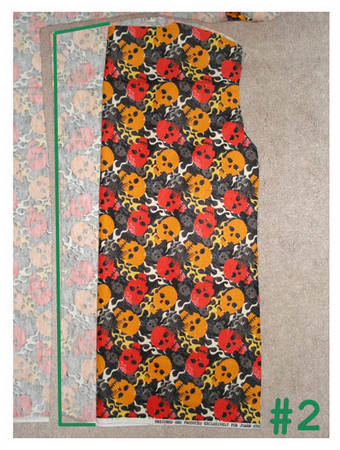
3. Now fold the fabric and along the fold lay the tshirt sleeve down. Adding about .5" to the bottom cut the shape out at whatever length you desire. Repeat.
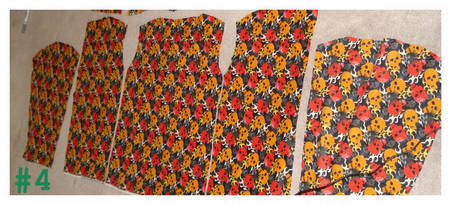
4. Now you should have 5 pieces. 1 back. 2 front. 2 sleeves. If you don't have this reread steps 1-3.
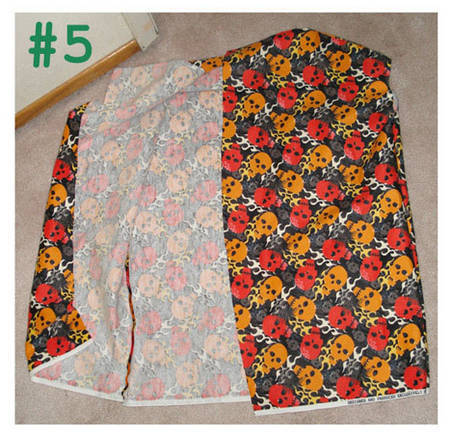
5. Now we start to sew. Take the back piece and sew the front pieces to it. You should be sewing down the side and along the shoulders. If you were to put this on now it'd be like an ugly vest.
6. Now cut out pockets. Your choice of the size and shape but mine look like this. I take some of the rib knit fabric and cover the edge.
7. Now take your main piece and fold that extra fabric in.
8. Once you've decided where the fold will be unfold and pin the pocket in place. Part of the pocket should overlap the fold. Sew it down.
9. Now that you've sewn it down fold it over again and pin the folds in place.
10. Now sew the bottom band on. The band should be slightly shorter than the whole bottom so you can stretch it a little as you sew. That will give the bottom a slightly snugger fit.
11. Now pin the zipper on under the folds and try it on to make sure the zipper isn't lumpy. Then sew it down. (If you have extra fabric at the neck fold it down like a v-neck)

12. Now onto the sleeves! If you don't have something relatively close to what was shown in the previous picture you might want to reread some steps before moving on. So take your sleeves and sew them so they look like sleeves. (hopefully it's self explanatory)
13. Once you've sewn up the sleeves you can sew them to the main piece. Make sure everything is going in the right direction before sewing. Multiple times I've ended up w/ inside out sleeves.

14. Now sew some cuffs. Then sew them onto the bottom of the sleeve. Didn't really show this but hopefully you can figure it out..
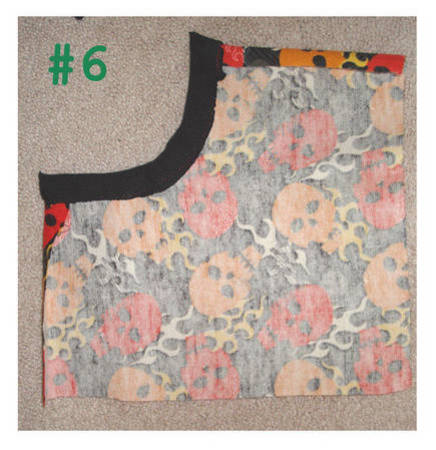
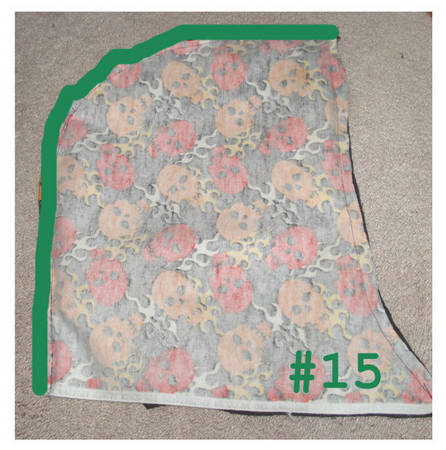
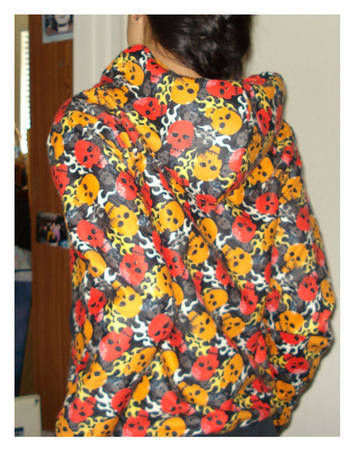
15. Okay we're almost done! Now we move onto the hood. READ THIS PART CAREFULLY I CAN BE A BIT CONFUSING. Look at the previous picture. See that line I drew around the neck.. Measure that. Divide that number in half. That number is the length of the bottom part of the hood. (bottom straight edge in the picture below) The shape of the hood is your choice. Now cut 2 of those out in your main fabric and 2 of those out in the lining. [i forgot to take pictures of the pieces]. Now with the right sides facing each other sew along the green line on the main fabric and the lining. You should have 2 seperate hoods now (one hood is main fabric, one is lining).
16. Now with the right sides of the hoods facing each other, sew along the green line.

17. Turn it right side out and you have your hood. This is the time to add a drawstring thingy if you want. That would be done by poking holes at the bottom and sticking a shoelace/ribbon through.
18. Now sew the hood to the main piece. If you want you can cover this seam because it will be the most visible when you are wearing it.

19. YOU'RE DONE. Admire your work! or if you aren't happy with what you made.. salvage the zipper, scrap the rest and start over!!
cRAFT: pAPER bEAD cRAFT
My dear friend Jennifer sent me this article- the beads are adorable :) Fun to do and make
•ruler
•magazines
•scissors
•pencil
•glue
•modge podge (optional)
From:
http://www.papervinenz.com/2012/07/paper-bead-tutorial-summer-fun.html
Paper Bead Tutorial - SUMMER FUN!
Tuesday, July 10, 2012
Hi Everyone
Here is a fun activity for a Summertime Camp, party or sleepover - a necklace made from paper beads. I created this post for Design Dazzle - so hop on over there and see what other fun things they have in store for you at their Summer Camp!

First, using a sharp knife or scissors, cut your paper to the shapes shown below. I like to cut a template from an old cereal box and then draw multiple images by tracing onto scrapbook paper lightly with a pencil. Then use a knife or scissors to cut out (your kids may be able to do this depending on age - but you DO need to be reasonably accurate).

Using a cocktail stick, wrap the wide end of each strip around tightly and secure using a tiny spot of Elmer's glue (I used Tombow liquid glue which holds and dries in a couple of seconds).

Keep on rolling using the occasional spot of glue until you reach the end - and you are done! You can see below several examples of each bead - you don't have to worry at all about them all looking identical - they won't!

I then gave my beads coat of Glossy Mod Podge for extra shine and protection - but even without that the beads are pretty solid. Remember - they ARE paper though - and won't really tolerate getting wet!
You can then thread them onto string or elastic - they look really great with some plain acrylic beads separating them - especially in these bright colors. I have used the Paradise Beach Collection from Echo Park Paper to make these - available here at amazon.com or any scrapbook store.

I am linking this project up to these websites here.

Things to do when you're bored. I only post hilarious things.
http://youtu.be/JSlFrsXQL0w
Embedding disabled by request sorry :(
Embedding disabled by request sorry :(
Tuesday, August 7, 2012
Awesome Handbag!
Just painted my nails, got my hair done, have to shave still ;) 'cause school starts tomorrow and anyway, I found this really cute backpack I wish I could afford. I just applied at two places so hopefully someday? (clearance?)
OMG it's not on the site anymore *panic* EBAY!!!!!!
pic:
 (Olsenboye Striped Backpack)
OMG it's not on the site anymore *panic* EBAY!!!!!!
pic:
 (Olsenboye Striped Backpack)
Subscribe to:
Posts (Atom)