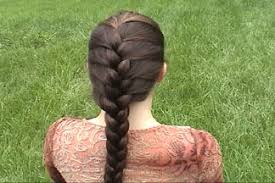
French Braid 
From:http://www.realsimple.com/beauty-fashion/hair/tools-techniques/french-braid-hair-00000000002190/index.html
Follow These Seven Easy Steps
Time Inc. Studios
1Brush hair
Before braiding, brush hair to smooth out any knots or tangles.
Time Inc. Studios
2Gather hair at top of head; divide into three sections
Starting at the hairline, gather enough hair from top of head to start a regular braid. Divide hair into three equal sections. Hold right section in right hand, left section in left hand, and middle section between thumb and another finger of either hand.
Time Inc. Studios
3Cross the sections
To begin braid, cross right section over middle section, then repeat this move with left section, smoothing hair down as you go. Pull sections fairly tight; you don’t want the braid to be loose and come undone.
Time Inc. Studios
4Add hair to the section
Before repeating your cross-over motion with the right section, gather a little bit of additional hair from the head’s right side, and add it to this section; now cross this larger portion of hair over the middle section of the braid.
Tip: Make sure that the sections of hair you’re adding are roughly equal or the braid will look lopsided.
Tip: Make sure that the sections of hair you’re adding are roughly equal or the braid will look lopsided.
Time Inc. Studios
5Add hair to the section on the other side
Gather a small section (of equal size to the one you just gathered) of the remaining hair on the left side of your head up and into the left section and cross that over the middle section.
Tip: Slightly dirty hair has less “slip,” making it easier to braid.
Tip: Slightly dirty hair has less “slip,” making it easier to braid.
Time Inc. Studios
6Repeat adding hair and crossing sections
Repeat steps 4 and 5, adding hair until you’ve gathered in all additional hair strands. Finish at the bottom with a regular braid.
Time Inc. Studios
7Secure the braid at the end with a band
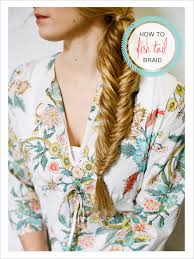
Fishtail
Once you reach the bottom of the braid, secure the end with a hair band, wrapping it tightly around the hair.
The cascade braid recently exploded as the new "trend braid" of the season. The waterfall effect looks cool and complex, but it's easier to style than you think. Give this beautiful braid a try when Beautylish takes you through the how-to!
STEPS 1 + 2
Section Off
This style works best on straight or loose waves. Brush out all the knots with a wide tooth comb. Part your hair how you normally would, and begin your braid on the right side of your part. Grab the top section and divide into three strands.
STEPS 3 + 4
Braid As Usual
Braid your strands regularly three times, beginning from the right strand. When you get to the left strand (the part closest to the middle of the scalp), add more hair to it like a French braid and fold that strand to the center.
STEP 5
Drop the Strand
This is where it gets tricky. After you've French braided your left strand (now center), drop the right strand and let it fall down. Pick up another small section of hair next to where your original strand fell—that's your new right strand.
STEP 6
Step and Repeat
Repeat this process—French braid the left strand, drop the right strand, and pick up an adjacent new piece. Gradually cascade the style towards the middle of your head.
STEP 7
Pin and Secure
Once you've reached a comfortable point to stop your braid, secure it to your scalp with bobby pins. You don't have to pin up your hair perfectly in this section since you'll cover up the pins with a hair accessory later.
STEPS 8 + 9 + 10
Fishtail It!
Braid the remaining piece of hair left from your cascade into a fishtail braid. Not sure how to create this mermaid-inspired style? It's easy with this helpful fishtail braid tutorial. Secure the braid with a thin hair tie.
STEP 11
Accessorize
Add a cute bow or flower to hide your bobby pins and give this look some extra hair flair. Secure your barrette tightly to your scalp and braid for a firm hold.
Take the extra strand of hair on the opposite side of your face and pin it back into the flower barrette so it blends in with your cascade. Spritz with a light-hold hairspray, and you've got yourself a beautiful and romantic summer hair style!
Fishtail 
1. Part your hair down the center. Beginning on the right side of your part at your forehead, twist a one-inch section of hair away from your face.
2. Use a comb to separate a 1/2-inch section right below the first section along your face and twist that piece away from your face, combining it with the first piece.
3. Continue adding 1/2-inch pieces along your hairline down to your neck. Use a clip or a bobby pin to hold the hair in place at the nape of your neck.
4. Repeat the twisting on the left side, starting at your forehead.
5. When you reach the nape of your neck, unclip the right side and hold both the left and right sides in two separate sections.
6. Pull a 1/2-inch section of hair from the right section and add it to the left section. Repeat with a piece from the left section, adding it to the right section.
7. Continue adding 1/2-inch pieces down to the ends and secure with an elastic.

No comments:
Post a Comment