Thursday, July 24, 2014

Free Cool Fonts


Free fonts. Easy to download. Works with your computer applications, Microsoft Word, etc. simplythebestfonts.net

Best fonts are:

  • AEginma Scrawl -  (Personal fave, kicked Comic Sans MS right off the map)
  • Twelve Ton Goldfish
  • Loki Cola
  • Go through them all and find your style :)

ADBLOCK

Hate ads? Download Google Chrome and hit up the app store for Adblock! It's free and it'll block every ad, ever!

Monday, September 30, 2013

Crank Out Those SAT Scores~!

http://www.sparknotes.com/testprep/books/newsat/index.html

Sparknotes, the place where all your difficult chapter books are unravelled, offers a freee SAT prep book online. I'm finding it helpful:)
What does SAT stand for anyway? Nothing. It stands for nothing at all. Now you know.

SparkNotes

The most helpful book for me was "Hack the SAT". My scores went up a lot! The guy got a 2400 on his SAT and is a tutor. I got a 1920.


image^ from: http://www.userlogos.org/node/12106

Office Pranklololol

Funny computer prank for the office.
posted on 9gag in September 2013: http://9gag.com/gag/a9drxqW#_=_

How to Most Efficiently Use One Notecard on Exams!

My professor said I could only use one notecard
image originally posted on 9gag: http://9gag.com/gag/adNK9QZ?ref=android

Sunday, August 18, 2013

Sleep As Android- Wake Up AWESOME

https://play.google.com/store/apps/details?id=com.urbandroid.sleep&hl=en

This app, one word: AWESOME. It wakes you up within 20 or 30 minutes of your alarm(you choose) to wake you up in the lightest stage of your sleep cycle. Freaking amazing. You set your phone on your mattress and then voilĂ   you wake up in the morning to your alarm but feel like you should have woken up! It's awesome and I hate to alarm without the sleep tracking now.
I choose to scan a QR in the morning to turn off the alarm, it's on my doorknob.
Also, you have the option to snooze or dismiss the alarm. If you snooze it you can choose for how much amount of time, 1 minute, 5 minutes, 10, 15, or 20.

Best app ever. 14 day free trial but I paid the $2.99 for the unlock because I felt so much better.

~Love Lizarus:)
Cover art

Wednesday, July 31, 2013

Sunday, July 28, 2013

Homemade Sugar Wax and Facial Scrub Recipes

Sunday, April 7, 2013

Super Bubbles and Do-it-Yourself Glowsticks!

Don't know where the images came from sorry, 9gag.com and 4chan on Facebook displayed the pictures


Thursday, February 21, 2013

Coolest Vending Machines

 www.toxel.com
 http://summerwonders.onsugar.com/

flikr.com I've used one of these:) Many smiles!

www.seventeen.com
ccdblog.com


http://www.nowthatsnifty.com/2011/03/101-pringle-flavors-from-around-world.html#.USbK56U4vy0 and while we're at it heres 101 crazy pringles flavors goodnight

Are you for or against eliminating the penny? I think we should make them out of cheaper materials.


Penny pinching: Can Obama manage elimination of one-cent coin?


President Barack Obama finally broke his silence on an issue of national importance Friday – he thinks it’s time to retire the penny.
The possible extinction of the one-cent coin was a featured economic question in a Google+ Hangout with the Commander in Chief last week as John Green, the co-creator of a popular YouTube channel, applied a little presidential peer pressure.
“Australia, Canada, New Zealand, many other countries have gotten rid of their pennies,” Green said. “Why haven’t we done it?”
“I gotta tell you, John, I don’t know,” Obama responded, adding, “Anytime we’re spending money on something people don’t actually use, that’s an example of things we should probably change.”
But why should anyone care? They’re pennies. Aren’t there more valuable things to worry about?
First, pennies actually cost more to make than they’re worth. In 2012, every penny cost 2.41 cents to make – more than twice their face value.
And as zinc and copper – materials used in minting the penny – have become costlier due, in part, to manufacturing shifts in China, which are likely to raise costs further.
Granted, the total cost of minting pennies was only $58 million last year – less than one-tenth of a percent of total federal spending in 2012 – but groups like Citizens to Retire the U.S. Penny have long been making the economic case for getting rid of the penny (plus, the group adds, fishing for pennies adds about 2 seconds to each cash transaction per day).
And the U.S. military has already decided they’re essentially useless; all Army and Air Force Exchange Service stores on bases round all cash purchases up or down to the nearest nickel.
With both parties looking for ways to cut government spending, it seems as though cutting penny production could be a relatively painless, if insignificant, place to start. But in the Google+ Hangout, Obama ceded that Washington has bigger fiscal fish to fry.
“The penny is an example of something that I need legislation for,” he said. “And, frankly, given all of the big issues that we have to deal with day-in/day-out, a lot of times it just doesn't -- you know, we're not able to get to it.”
There have actually been efforts to pass penny-banning legislation. Back in 2001, then-Rep. Jim Kolbe (R-AZ) introduced the “Legal Tender Modernization Act,” which would have made pennies obsolete by requiring retailers to round up or down to the nearest nickel on cash purchases.
That bill failed, and Kolbe’s second attempt in 2006, the “Currency Overhaul for an Industrious Nation (COIN) Act,” after zinc costs nearly doubled, met a similar fate.
But the president doesn’t need Congress to explore other, cheaper alternatives to zinc – the main metal in pennies. In fact, the administration’s 2013 budget encourages the Treasury to “explore, analyze, and approve new, less-expensive metals for all circulating coins like aluminum, iron and lead.”
It wouldn’t be the first time Abe Lincoln’s coin got a makeover. Back in 1982, the penny changed from 95 percent copper and 5 percent zinc to 97.5 percent zinc and 2.5 percent copper.
(And lest so-called “penny hoarders” try to melt that valuable pre-1982 copper down, the Mint in 2006 prohibited the melting of pennies and nickels. It also made it a crime to carry more than $5 in one and five-cent coins out of the country).
Changes to the composition of pennies do have Congressional champions: Ohio Rep. Steve Stivers (R) introduced the “Cents and Sensibility Act” in December 2011, which would mandate that pennies were out of American steel (much of which comes from the Buckeye State) and dipped in copper. 
But these efforts will be met with some serious resistance from the zinc lobby (yes, there is one). The company Jarden Zinc, which creates “metal and zinc coinage,” according to its website, paid lobbyist Mark Weller $340,000 in 2012 to discuss issues related to “minting/money/gold standard” with members of Congress and the Mint, according to the Center for Responsive Politics.
Weller also represents the pro-penny group Americans for Common Cents, whose website warns of the risk of inflation that eliminating the penny would bring, and whose headquarters are on K Street, known for its many D.C. lobbyist offices. 
“Americans for Common Cents aims to inform and educate policymakers, consumers, and the media about the penny’s economic, cultural, and historical significance,” the group’s website reads.
The political power of the penny is likely another reason Obama hasn’t acted on getting rid of it. As far back as 2008, when he was still a candidate, the “penny lobby” appeared to mystify Obama.
Asked about it at a town hall in Pennsylvania, he said, “We have been trying to eliminate the penny for quite some time -- it always comes back,” joking, “I need to find out who is lobbying to keep the penny.”


Sunday, November 4, 2012

Females: Are you a tetrochramatic?

This has to do with the number of cones in your eyes. http://honda-tech.com/showthread.php?t=3038054
If you see the letters or numbers in the circles, you are an advanced eyesighter person and may see 99million more colors than the average human! :P I can see them faintly, not sure what it means exactly, but kudos to you...

Monday, September 24, 2012

The Wilderness Downtown

Chrome built THIS interactive music video based on your childhood home. It's the best I've ever seen my browser do. Check it http://thewildernessdowntown.com/
*Mac/PC

FUCKING AMAZING BTW


How they made:
http://malbonnington.com/if-you-like-the-wilderness-downtown-you-might

Friday, September 7, 2012

Fabtastical Cake!

From: http://www.flickr.com/photos/emily-weaver-brown/4827840735/in/faves-38319530@N03/


I just used box white cake mixes - 10 of them that I bought on sale. I had 6 6x6 cake pans and I mixed and baked 2 cake mixes at a time, divided them into 6 bowls and mixed in Wilton gel food coloring bought at JoAnns. It's not that hard to do. The hardest part was actually mixing all the icing up (it was a cream cheese frosting) - I had to do it in 4 batches because it just wouldn't all fit in my KitchenAid (powdered sugar everywhere).
I had seen the idea back in February on Ohdeedoh and I knew that I had to do it for his 30th
www.ohdeedoh.com/ohdeedoh/meal-time-goods/ano ther-rainbow...
My 30th is in December and I have already told him that he can make me one but I want mine to be 30 different layers of chocolate.

Thursday, September 6, 2012

This awesome Urn will turn you into a tree when you die!


You don't find many designers working in the funeral business thinking about more creative ways for you to leave this world (and maybe they should be). However, the product designer Gerard Moline  has combined the romantic notion of life after death with an eco solution to the dirty business of the actual, you know, transition.
His Bios Urn is a biodegradable urn made from coconut shell, compacted peat and cellulose and inside it contains the seed of a tree. Once your remains have been placed into the urn, it can be planted and then the seed germinates and begins to grow. You even have the choice to pick the type of plant you would like to become, depending on what kind of planting space you prefer. 
bios2
I, personally, would much rather leave behind a tree than a tombstone. 

BUY IT HERE~~  -ETERNITREES-

Wednesday, August 29, 2012

Nice way to find cool blogs :)

http://www.sarthak.net/blogz/
Search engine- search interesting, lizard, lizarus, anything!

World's youngest Grandma!


rifca stanscu Worlds YOUNGEST Grandma
How old is YOUR grandma/mimi/nonny?  50ish? 60ish?  WELL, a Romanian woman is said to be…
23…yes, as in TWENTY THREE YEARS OLD…born in 1988!  According to numerous online reports, Rifca Stanescu ran away from home when she was 11 and eloped with her 13 year old boyfriend.  They had their first child a year later.
Well, now Rifca’s 11 year old daughter went and got hitched at the age of 10 and now has a child of her own, making Rifca arguably the world’s YOUNGEST Grandma!
According to what I’ve read, Rifca’s family forgave her for running away after the birth of her first child and wanted MORE for her daughter…but that obviously hasn’t worked out quite like she had planned.
Oh and one more little side note…Rifca’s mother is 40, which may make her the world’s YOUNGEST GREAT-GRANDMA.
NOT WINNING!

Tuesday, August 28, 2012

Free Seventeen Magazine Online

Zinio.com Digital Magazine Viewer


username: fennecfoxxy@gmail.com
password: broccoli


French Braiding, Fishtail, Waterfall Braids


French Braid         


From:http://www.realsimple.com/beauty-fashion/hair/tools-techniques/french-braid-hair-00000000002190/index.html


Follow These Seven Easy Steps 

How To: French Braid Hair Step 1
Time Inc. Studios
1Brush hair
Before braiding, brush hair to smooth out any knots or tangles.
How To: French Braid Hair Step 2
Time Inc. Studios
2Gather hair at top of head; divide into three sections
Starting at the hairline, gather enough hair from top of head to start a regular braid. Divide hair into three equal sections. Hold right section in right hand, left section in left hand, and middle section between thumb and another finger of either hand.
How To: French Braid Hair Step 3
Time Inc. Studios
3Cross the sections
To begin braid, cross right section over middle section, then repeat this move with left section, smoothing hair down as you go. Pull sections fairly tight; you don’t want the braid to be loose and come undone.
How To: French Braid Hair Step 4
Time Inc. Studios
4Add hair to the section
Before repeating your cross-over motion with the right section, gather a little bit of additional hair from the head’s right side, and add it to this section; now cross this larger portion of hair over the middle section of the braid.

Tip: Make sure that the sections of hair you’re adding are roughly equal or the braid will look lopsided.
How To: French Braid Hair Step 5
Time Inc. Studios
5Add hair to the section on the other side
Gather a small section (of equal size to the one you just gathered) of the remaining hair on the left side of your head up and into the left section and cross that over the middle section.

Tip: Slightly dirty hair has less “slip,” making it easier to braid.
How To: French Braid Hair Step 6
Time Inc. Studios
6Repeat adding hair and crossing sections
Repeat steps 4 and 5, adding hair until you’ve gathered in all additional hair strands. Finish at the bottom with a regular braid.
How To: French Braid Hair Step 7
Time Inc. Studios
7Secure the braid at the end with a band
Once you reach the bottom of the braid, secure the end with a hair band, wrapping it tightly around the hair.
The cascade braid recently exploded as the new "trend braid" of the season. The waterfall effect looks cool and complex, but it's easier to style than you think. Give this beautiful braid a try when Beautylish takes you through the how-to!

STEPS 1 + 2

Section Off
This style works best on straight or loose waves. Brush out all the knots with a wide tooth comb. Part your hair how you normally would, and begin your braid on the right side of your part. Grab the top section and divide into three strands.

STEPS 3 + 4

Braid As Usual
Braid your strands regularly three times, beginning from the right strand. When you get to the left strand (the part closest to the middle of the scalp), add more hair to it like a French braid and fold that strand to the center.

STEP 5

Drop the Strand
This is where it gets tricky. After you've French braided your left strand (now center), drop the right strand and let it fall down. Pick up another small section of hair next to where your original strand fell—that's your new right strand.

STEP 6

Step and Repeat
Repeat this process—French braid the left strand, drop the right strand, and pick up an adjacent new piece. Gradually cascade the style towards the middle of your head.

STEP 7

Pin and Secure
Once you've reached a comfortable point to stop your braid, secure it to your scalp with bobby pins. You don't have to pin up your hair perfectly in this section since you'll cover up the pins with a hair accessory later.

STEPS 8 + 9 + 10

Fishtail It!
Braid the remaining piece of hair left from your cascade into a fishtail braid. Not sure how to create this mermaid-inspired style? It's easy with this helpful fishtail braid tutorial. Secure the braid with a thin hair tie.

STEP 11

Accessorize
Add a cute bow or flower to hide your bobby pins and give this look some extra hair flair. Secure your barrette tightly to your scalp and braid for a firm hold. 
Take the extra strand of hair on the opposite side of your face and pin it back into the flower barrette so it blends in with your cascade. Spritz with a light-hold hairspray, and you've got yourself a beautiful and romantic summer hair style!

Fishtail   


1. Part your hair down the center. Beginning on the right side of your part at your forehead, twist a one-inch section of hair away from your face.
2. Use a comb to separate a 1/2-inch section right below the first section along your face and twist that piece away from your face, combining it with the first piece.
3. Continue adding 1/2-inch pieces along your hairline down to your neck. Use a clip or a bobby pin to hold the hair in place at the nape of your neck.
4. Repeat the twisting on the left side, starting at your forehead.
5. When you reach the nape of your neck, unclip the right side and hold both the left and right sides in two separate sections.
6. Pull a 1/2-inch section of hair from the right section and add it to the left section. Repeat with a piece from the left section, adding it to the right section.
7. Continue adding 1/2-inch pieces down to the ends and secure with an elastic.


Have fun girls!!! :D


cRAFT: mAKE yOUR oWN hOODIE

From:
 http://making-your-own-style.fabsugar.com/How-make-your-own-Hoodie-tutorial-603430


Ok i came across this tutorial i thought i'd share with u guys from www.craftster.org and thought its damn cool..even though i haven't ever tried sewing an item of clothing before i may give it a try!!!
So the site says-
so to start things off. my veggietales hoodie. not really a flattering color or print but it's super warm because i lined the entire hoodie, sleeves and all, with flannel.

now onto the tutorial. please read this carefully before asking too many questions. I'll try to be as clear as possible. I directed this tutorial towards someone who has sewn a piece of clothing before. Not going into detail about how to attach sleeves and such but it should be quite simple to figure out.
Materials: 2+ yards of main fabric, .5 yard lining (for hood), 20" or longer separating zipper, .5 yard rib knit fabric, 1 tshirt, it would also be useful to have a hoodie next to you while you're doing this just to make sure things look right.
Instructions:
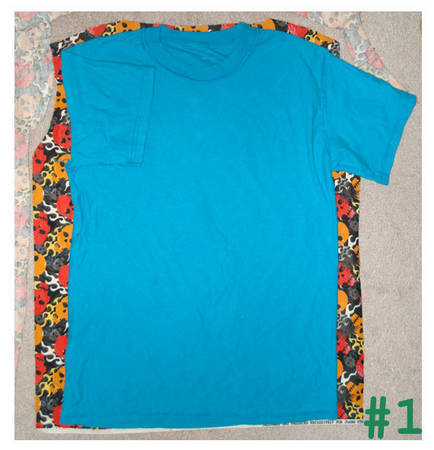
1. Place the tshirt on top of the fabric. fold the sleeves in and cut out the shape adding about .75" on both sides.
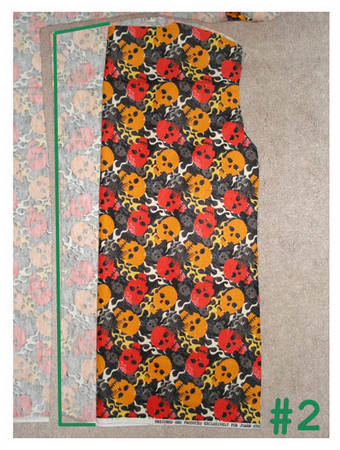
2. Take the piece you just cut out and fold it in half. Lay it over the fabric and cut it out adding 1" - 1.5" to the straight edge. Repeat.
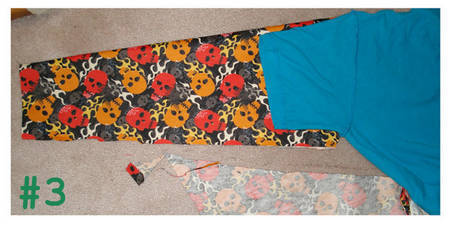
3. Now fold the fabric and along the fold lay the tshirt sleeve down. Adding about .5" to the bottom cut the shape out at whatever length you desire. Repeat.

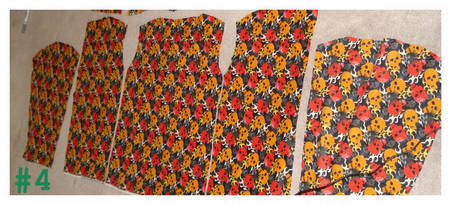
4. Now you should have 5 pieces. 1 back. 2 front. 2 sleeves. If you don't have this reread steps 1-3.
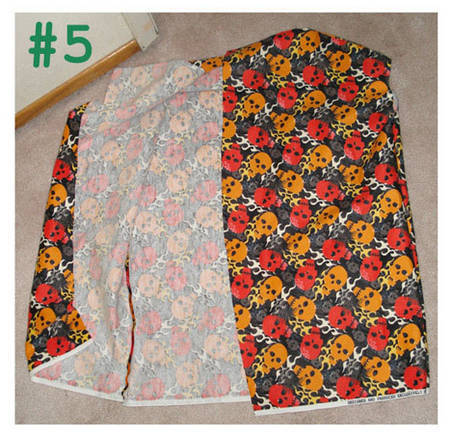
5. Now we start to sew. Take the back piece and sew the front pieces to it. You should be sewing down the side and along the shoulders. If you were to put this on now it'd be like an ugly vest.
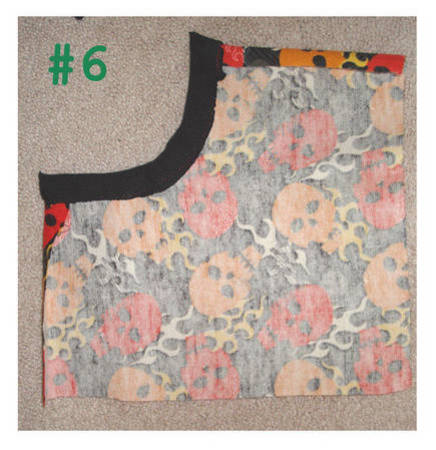
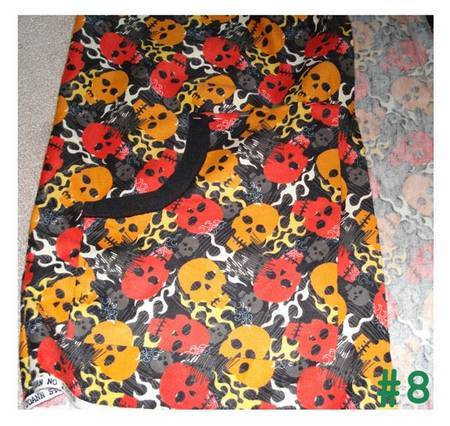
6. Now cut out pockets. Your choice of the size and shape but mine look like this. I take some of the rib knit fabric and cover the edge.
7. Now take your main piece and fold that extra fabric in.
8. Once you've decided where the fold will be unfold and pin the pocket in place. Part of the pocket should overlap the fold. Sew it down.
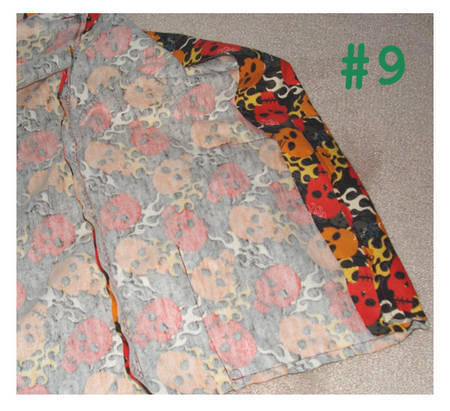
9. Now that you've sewn it down fold it over again and pin the folds in place.
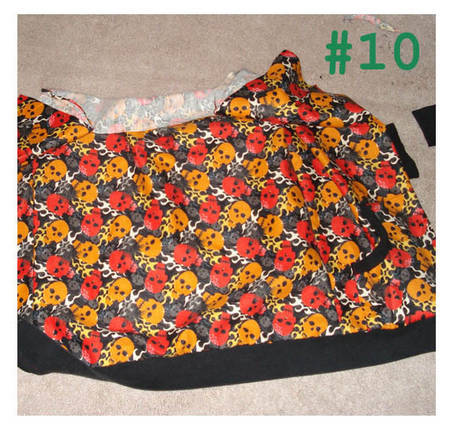
10. Now sew the bottom band on. The band should be slightly shorter than the whole bottom so you can stretch it a little as you sew. That will give the bottom a slightly snugger fit.
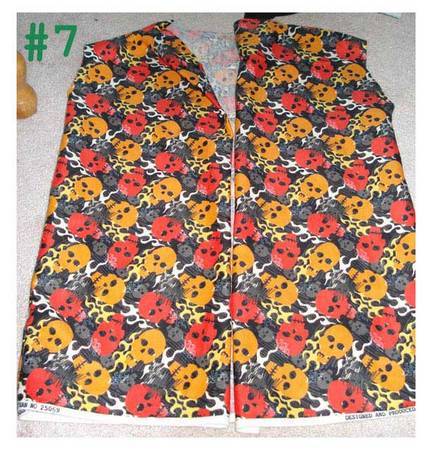
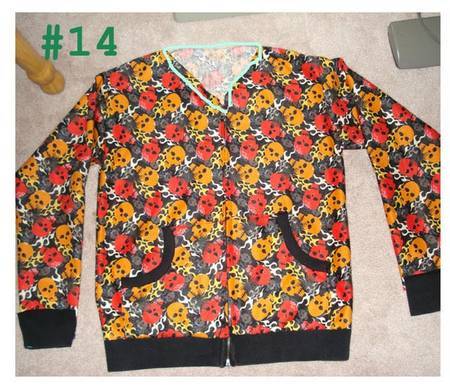
11. Now pin the zipper on under the folds and try it on to make sure the zipper isn't lumpy. Then sew it down. (If you have extra fabric at the neck fold it down like a v-neck)
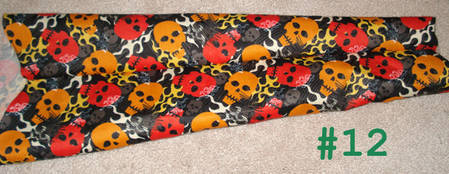
12. Now onto the sleeves! If you don't have something relatively close to what was shown in the previous picture you might want to reread some steps before moving on. So take your sleeves and sew them so they look like sleeves. (hopefully it's self explanatory)
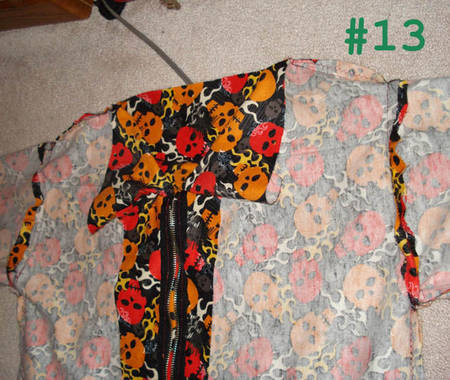
13. Once you've sewn up the sleeves you can sew them to the main piece. Make sure everything is going in the right direction before sewing. Multiple times I've ended up w/ inside out sleeves.
14. Now sew some cuffs. Then sew them onto the bottom of the sleeve. Didn't really show this but hopefully you can figure it out..
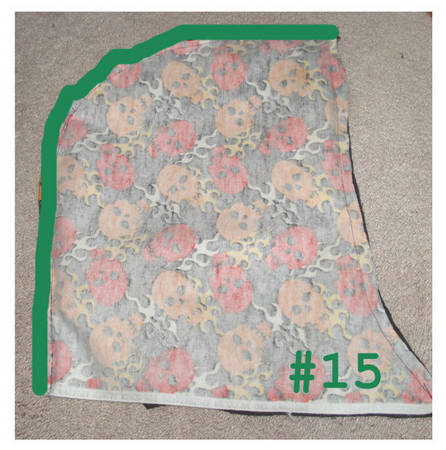
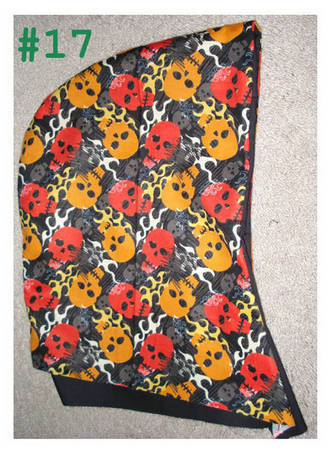
15. Okay we're almost done! Now we move onto the hood. READ THIS PART CAREFULLY I CAN BE A BIT CONFUSING. Look at the previous picture. See that line I drew around the neck.. Measure that. Divide that number in half. That number is the length of the bottom part of the hood. (bottom straight edge in the picture below) The shape of the hood is your choice. Now cut 2 of those out in your main fabric and 2 of those out in the lining. [i forgot to take pictures of the pieces]. Now with the right sides facing each other sew along the green line on the main fabric and the lining. You should have 2 seperate hoods now (one hood is main fabric, one is lining).
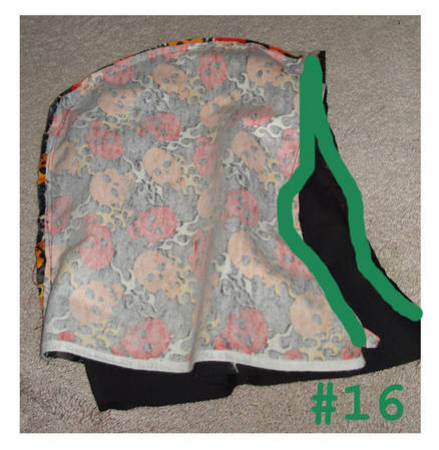
16. Now with the right sides of the hoods facing each other, sew along the green line.
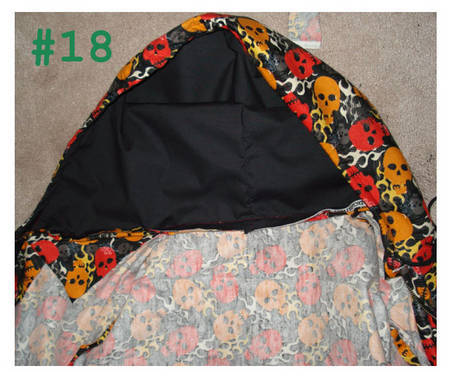
17. Turn it right side out and you have your hood. This is the time to add a drawstring thingy if you want. That would be done by poking holes at the bottom and sticking a shoelace/ribbon through.
18. Now sew the hood to the main piece. If you want you can cover this seam because it will be the most visible when you are wearing it.
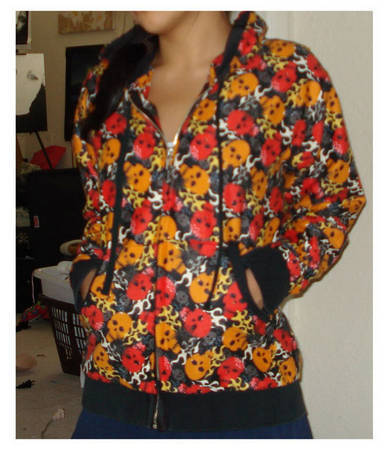
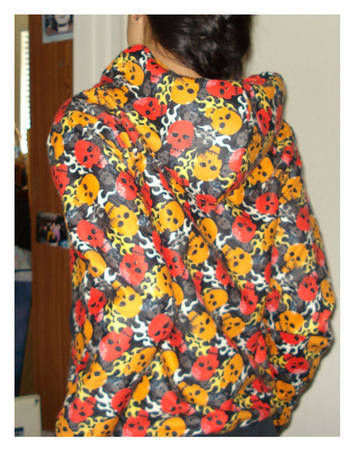
19. YOU'RE DONE. Admire your work! or if you aren't happy with what you made.. salvage the zipper, scrap the rest and start over!!